Quick Answer: 90% of Jura problems are caused by one of three things: grind too coarse (weak espresso), dirty brew group (run a cleaning tablet), or scale buildup (run descaling). Start with cleaning if you have not done it in the past 200 brews. If coffee is cold, descale. If a specific error message is showing, jump to the error codes section below.
Find your symptom below. Each section gives the most common causes and direct fixes. For complex problems, follow the link to the detailed guide. Need a quick answer? The quick-fix troubleshooting guide has the most common fixes in a single table.
Jump to Your Problem
- Coffee is weak or watery
- Coffee is not hot enough
- Fill beans error but hopper is full
- Milk frother not working / bad foam
- Error codes and warning messages
- Machine not turning on
- Coffee grounds in the cup
- Water leaking from the base
- Grinder making unusual noise
- Cleaning cycle problems
- WiFi and J.O.E. app not connecting
- Machine shuts off mid-brew
Coffee Is Weak or Watery
The most common complaint from new Jura owners. Usually fixable in under 5 minutes.
Check these in order:
- Grind setting too coarse - Go to Settings and move the grind one step finer. Brew 2-3 cups to flush old grounds before evaluating. This is the most common fix.
- Strength setting too low - The strength (aroma) setting controls how much coffee is used per drink. Increase it 1-2 levels from the drink settings menu.
- Stale or wrong beans - Coffee starts losing flavor 2-4 weeks after roasting. Light roast beans always taste weaker. Use a medium to medium-dark espresso roast with a recent roast date. See our tested bean recommendations for picks that work reliably in a Jura.
- Water volume too high - Check the drink’s volume setting. If someone set the espresso to 80ml instead of 40ml, it will be diluted. Reset to default volumes.
- Dirty brew unit - Coffee oil buildup on the piston reduces extraction. Run a cleaning tablet cycle. A single cleaning often restores full strength immediately.
- Scale buildup reducing brew temperature - Scale on the boiler reduces water temperature, leading to under-extraction. Run a descaling cycle if you are overdue.
- Worn grinder burrs - If the machine is 5+ years old and gradual decline is happening despite fresh beans and a clean machine, burrs may need professional replacement.
Quick diagnosis table:
| Symptom | Most Likely Cause | First Fix |
|---|---|---|
| Weak since day one | Grind too coarse or strength too low | Adjust grind finer + increase strength |
| Was strong, now weak | Dirty brew unit or stale beans | Run cleaning tablet cycle |
| Watery with no crema | Wrong roast or very stale beans | Switch to fresh medium-dark roast |
| First cup weak, rest fine | Machine not fully warmed up | Run rinse cycle before first brew |
| Weak despite finest grind | Worn burrs or scale buildup | Descale, then contact service |
Full step-by-step guide: Jura Coffee Weak or Watery - 7 Fixes
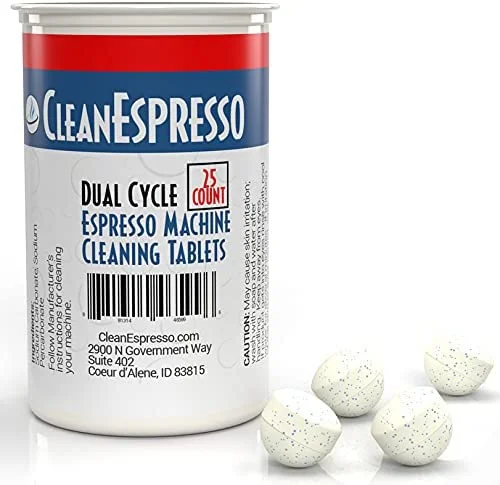
Fixes Weak Coffee Immediately
Jura Cleaning Tablets
Oil buildup is one of the top causes of weak, flat espresso. A single cleaning cycle often restores full flavor in 10 minutes.
If Beans Are the Cause
Lavazza Super Crema - Best for Jura
Medium-dark, dry surface, works at default grind settings. The most consistent performer across espresso and milk drinks.
Coffee Is Not Hot Enough
Super-automatics brew at slightly lower apparent temperatures than drip machines, but cold coffee is a real problem with real fixes.
Check these in order:
- Cold cup absorbing heat - A room-temperature ceramic cup drops perceived temperature by 5-8°C. Run hot water into the cup from the machine’s hot water function, wait 20 seconds, discard, then brew. This is the most overlooked fix.
- Temperature setting too low - Each drink has its own temperature setting. Go to the drink settings menu and increase from Medium to High or Extra High.
- Machine still warming up - The first brew after startup may be cooler than subsequent ones. Run a blank rinse cycle before your first cup of the day.
- Scale buildup on the boiler - Scale acts as insulation, reducing the boiler’s ability to heat water efficiently. Coffee gets cooler over weeks as scale accumulates. Run a descaling cycle.
- Per-drink temperature reset - If a cleaning cycle or firmware update reset your temperature settings, they may have reverted to default Medium. Check and re-save your preferences.
| Symptom | Likely Cause | Fix |
|---|---|---|
| Always lukewarm, all drinks | Temperature setting too low | Increase per-drink temperature |
| First cup cold, rest fine | Machine still warming up | Rinse cycle before first brew |
| Lukewarm but machine feels hot | Cold cup absorbing heat | Preheat your cup |
| Getting cooler over months | Scale on boiler | Run descaling cycle |
Full step-by-step guide: Jura Coffee Not Hot Enough - All Fixes
Fill Beans Error But Hopper Is Full
The machine is not detecting bean flow into the grinder even though beans are there. Almost always a simple mechanical fix.
Check these in order:
- Bean gate in closed position - Most Jura models have a small lever or disc under the bean hopper that controls whether beans flow into the grinder chute. It can accidentally close when you remove the hopper lid. Check that it is in the open/unlocked position.
- Bean bridging - Beans can arch over the grinder inlet, especially oily or freshly roasted beans. Open the hopper and stir with a dry wooden spoon to break up clumps. Never use your fingers - the grinder pulls objects in.
- Single bean lodged in the inlet - Remove the hopper and look into the grinder inlet with a flashlight. A sideways bean can block flow completely. Dislodge with a wooden skewer.
- Grinder cleared but counter not reset - Some models show the fill beans message until you confirm or attempt a brew after refilling. Press confirm on the display or start a brew cycle.
- Oily beans clogging the grinder path - Very oily dark-roast beans leave residue that causes clumping over time. If this is a recurring problem, switch to a drier bean like Lavazza Super Crema.
What does NOT fix this error:
- Adding more beans on top of existing ones (the issue is flow, not quantity)
- Tapping the side of the machine
- Running a cleaning cycle (cleaning cycles do not clear bean sensor issues)
Full step-by-step guide: Jura Fill Beans Error Fix
Milk Frother Not Working / Bad Foam
90% of Jura milk frother problems are caused by dried milk residue restricting airflow or suction. Start with a thorough cleaning before assuming mechanical failure.
Thin or watery foam
- Run a milk system clean - Not a water rinse - use Jura Milk System Cleaner to dissolve protein buildup. A single deep clean restores foam quality in most cases.
- Use colder milk - Milk froths best at 3-5°C (straight from the fridge). Milk sitting at room temperature produces noticeably weaker foam.
- Check foam density setting - On models with HP2/HP3 fine foam (E6, E8, S8, Z10), there is a foam density adjustment. Make sure it is not set to minimum.
- Switch to whole milk - Fat content directly affects foam stability. Whole milk (3.5% fat) produces the best foam. Skim milk and most plant milks produce thinner foam.
- Check the milk tube seating - A loose connection at either end introduces air at the wrong point and produces flat, sputtering foam.
Milk frother spitting or sputtering
- Tube not submerged - If the milk level is low or the tube has curled up, the frother pulls air. Refill the container or reposition the tube.
- Cracked or kinked tube - Inspect the full length of the silicone tube. A hairline crack is enough to introduce air. Replace if damaged.
- Dirty connector - The connector where the tube meets the machine accumulates dried milk. Soak in warm water for 10 minutes and clean with a small brush.
No foam at all
- Completely blocked milk circuit - If the machine has not been cleaned for an extended period, milk protein can completely block the frothing channels. Run a milk system clean twice consecutively.
- Milk tube completely blocked - Remove the tube and blow through it. If blocked, soak in warm water with a drop of dish soap for 30 minutes.
- Milk system needs professional service - If cleaning does not restore frothing, the internal frothing valve or pump may need professional inspection.
Full step-by-step guide: Jura Milk Frother Not Working
Restore Foam Quality
Jura Milk System Cleaner
Dissolves dried milk protein that water rinses cannot remove. Most foam quality problems resolve after a single deep clean.
Error Codes and Warning Messages
Jura machines use plain-text messages for most prompts. Here are the most common ones and what they actually require.
Routine maintenance messages (not failures)
| Message | What it means | What to do |
|---|---|---|
| Fill bean container | Hopper empty or not flowing | Refill, check bean gate |
| Fill water tank | Tank empty or misseated | Fill and reseat firmly |
| Empty drip tray | Drip tray full | Remove, empty, rinse, replace |
| Empty grounds container | Puck drawer full | Empty while machine is ON |
| Clean machine | Cleaning due (~200 brews) | Run cleaning tablet cycle |
| Descale machine | Descaling due | Run descaling cycle - do not delay |
| Replace filter | CLARIS filter at capacity | Install new filter and reset counter |
| Rinse milk system | Post-milk rinse needed | Complete immediately |
Fault messages
“Brewing unit error” / “Error 8” / “Remove brewing unit” The brew group has not completed its movement. Power off, open the service door, remove the brewing unit, rinse it under warm water, inspect for stuck grounds or damaged seals, reinsert. If the error returns, contact Jura service.
Grinder error / unusual grinding sounds Empty the hopper completely and check for foreign objects (pebbles, chips). Do not repeatedly force the grinder. If no object is found, contact service.
Machine not heating / cold water only Run a descaling cycle - scale on the boiler is a common cause of heating failure. If descaling does not resolve it, the heating element needs professional service.
”!” with a number This is an error code. The number corresponds to a specific fault. See the full error code list: Jura Error Codes Guide
Color indicators (color display models)
- Yellow/amber prompt - Action needed soon, but machine continues to work
- Red or flashing - Blocking - the machine will not brew until resolved
Full guide: Jura Error Codes - Complete Reference
Machine Not Turning On
Check these in order:
- Power switch - Most Jura models have a small power button on the front, side, or back. On some models it is easy to overlook. Check the full machine.
- Outlet and cable - Test the outlet with another device. Check the power cable connection at the machine.
- Energy saving mode / auto-off - If the machine was set to power off after X hours of inactivity, pressing the power button once will wake it from standby. Wait 30-60 seconds for the startup rinse to complete.
- Machine locked (child lock) - Some models have a control lock that disables the display. Check if this was activated in Settings.
- Hard reset - Unplug the machine for 60 seconds, then reconnect and attempt to power on. This clears any stuck startup state.
- Fuse in the plug - In countries that use fused plugs (UK), the fuse in the plug can blow. Replace with the correct fuse rating.
If none of the above works, the machine requires professional service - this is typically an internal fuse or control board issue.
Coffee Grounds in the Cup
Grounds in the cup are unusual for a super-automatic and indicate one of these issues:
- Bypass doser (pre-ground chute) is blocked or dirty - If you use the pre-ground coffee function, residual grounds can fall through during normal brewing. Clean the bypass doser with a dry brush.
- Brewing unit needs cleaning - Accumulated grounds inside the brew group can pass into the cup during extraction. Run a cleaning tablet cycle.
- Brewing unit wear - Over time, the brewing unit’s fine mesh filter can develop micro-cracks or wear through. If grounds continue after cleaning, the brewing unit may need replacement. Contact Jura service.
- Grinder producing excessive fines - Very fine grind settings on certain bean types (especially dark, brittle roasts) can produce micro-grounds that pass through. Try one step coarser.
Water Leaking from the Base
Diagnose the source first:
- Drip tray overflow - Check if the drip tray is full. The tray overflow point is the most common source of apparent “base leaks.” Empty the drip tray.
- Water tank misaligned - A water tank not fully seated can cause water to drip down the outside of the machine to the base. Remove, check for debris on the seal, and reseat firmly.
- Water tank overfilled - If the tank is filled above the MAX line, it will overflow during the startup rinse. Check the water level.
- Internal seal failure - If the drip tray is empty, the tank is properly seated, and water is still pooling under the machine during operation, power off immediately. Do not use the machine. This indicates an internal tube or seal failure requiring professional service.
Important: Do not use a leaking machine until the source is identified. Continued use with an internal leak can cause electrical damage.
Grinder Making Unusual Noise
Diagnose by sound:
| Sound | Likely Cause | Action |
|---|---|---|
| Loud crunching/cracking | Foreign object in beans | Empty hopper, inspect inlet, remove object |
| High-pitched squealing | Beans too dry or very fine grind | Coarsen grind 1-2 steps, check bean type |
| Grinding continues with no output | Bean gate closed or bridging | Check bean gate, stir beans |
| Grinding louder than usual over time | Burr wear | Professional burr replacement |
| Rattling during grind | Loose hopper or component | Check hopper seating |
Never force the grinder repeatedly if it is making unusual sounds. A single foreign object can damage burrs if the machine is run multiple times.
Cleaning Cycle Problems
Machine keeps prompting to clean even after running the cycle
- The cleaning tablet may not have dissolved properly. Re-run the cycle with a fresh tablet placed directly in the tablet chute (bypass doser), not the bean hopper.
- On some models, you must confirm the completion of the cleaning cycle on the display before the counter resets. Check that you completed all on-screen steps.
Cleaning cycle will not finish / machine stops mid-cycle
- Water tank emptied during cycle - The cleaning cycle uses more water than a normal brew. Refill the tank and press start/continue.
- Machine needs to be restarted - Power off, wait 30 seconds, power on. The machine will usually resume or offer to restart the cycle.
Cleaning cycle runs but coffee still tastes off
The cleaning cycle cleans the brew group and internal channels, but it does not descale the boiler. If your coffee quality is still poor after cleaning, run a descaling cycle as well.
WiFi and J.O.E. App Not Connecting
Applies to models with built-in WiFi: Z10, S8, J8, WE8. Also E8 with WiFi Connect adapter.
- 5GHz vs 2.4GHz network - Jura machines connect on 2.4GHz only. If your router broadcasts separate 2.4GHz and 5GHz networks, make sure you are connecting to the 2.4GHz network.
- Router password changed - If you recently changed your router password, the machine needs to be reconnected. Go to Settings > WiFi on the machine display and re-enter credentials.
- J.O.E. app account sync - If the app shows the machine as offline, check that both the machine and phone are on the internet (not just local WiFi). The app communicates through Jura’s cloud.
- Machine too far from router - Super-automatics are typically in kitchens, which may be far from the router. A WiFi extender in the kitchen can stabilize the connection.
- Router firmware update - Some router firmware updates change network settings (band steering, WPA versions) that can break existing connections. If your machine disconnected after a router update, reconnect from scratch through the machine settings.
- Factory reset WiFi settings - On the machine, go to Settings > WiFi > Reset and set up the connection again from scratch.
Full guide: Jura Z10 WiFi Connection Problems
Machine Shuts Off Mid-Brew
- Power interruption - Check the outlet and cable. A loose cable connection can cause the machine to cut out under the load of brewing.
- Machine overheated - If multiple drinks were made in quick succession or the machine ran a cleaning cycle followed immediately by brews, it may have thermal protection activated. Let it rest for 10 minutes and try again.
- Water tank empty mid-brew - If the tank runs out during a brew, the machine will stop. Refill and restart.
- Brewing unit error causing mid-brew abort - If the brew group encounters resistance during extraction, the machine will abort the cycle and show an error. See the brewing unit error section above.
- Internal fault - If the machine shuts off consistently at the same point in the brew cycle and there is no clear cause, contact Jura service. This pattern often indicates a consistent fault (pump, sensor, or control board).
Maintenance Supplies for All Jura Problems
Most of the problems above are prevented or resolved by keeping the right supplies on hand. Jura machines need three things on a regular schedule:
Every 200 Brews
Cleaning Tablets
Removes coffee oil buildup from the brew group. Prevents weak coffee, clogging, and wear.
Check Price →Every 2-3 Months
Descaling Tablets
Removes limescale from the boiler. Prevents heating failure and protects the pump.
Check Price →Monthly (milk users)
Milk System Cleaner
Dissolves dried milk protein. Required for foam quality and hygiene.
Check Price →See the full schedule: Jura Maintenance Guide
When to Contact Jura Service
Most Jura problems are solvable at home. Contact Jura service when:
- A fault error persists after completing the recommended cleaning or descaling steps
- The brewing unit error returns repeatedly after cleaning
- Water is leaking internally (not from drip tray or tank)
- The machine does not heat at all after descaling
- The grinder produces no output after checking for obstructions
- The machine is 5+ years old and gradually declining despite regular maintenance
Jura offers a flat-rate repair service in the US. For machines under warranty (2 years), contact Jura directly before attempting any service. See Is It Worth Repairing a Jura? for a cost comparison of repair vs replacement.
See also: Jura Error Codes Guide | Jura Maintenance Schedule | Jura Coffee Weak or Watery | Jura Milk Frother Not Working | Jura Coffee Not Hot Enough | Descaling Not Working? | Jura E8 Review